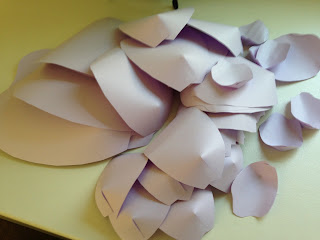
Supplies:
Tons of 8.5 x 11" craft paper
glue gun
pencil
scissors
Step 1: Creating the Leaves:
There are several sizes of petals, ranging from the largest at almost the entire size of the 8.5x11" paper, down to the smallest at about 3-4". I started by making the largest petals first, I sketched out a petal onto a sheet of paper and cut it out.
I then used this template to cut out 7 more of this size.
For the next size down I sketched out a petal half the size of the paper, folded it in half and cut out those two as templates
I then cut out 4 more, totaling six.
For the next size I sketched out a petal about a third of the size of the 8.5 x 11 paper, I then folded it and cut out three petals.
I cut out three more, totaling six.
For the last smallest size I folded the paper into thirds then in half, to make six small squares and sketched out a petal in one of these squares, refolded and cut out the six petals.
Step 2: Curl the Petals:
To give the flower a more realistic looks you need to curl the petals. I just rolled starting from the top of the petal inward (you can do some flowers all rolled outwards, or vary the petals so some go in and some go out).
Step 3: Cut out the Base:
The petals will all be glued to a circle base. This should be about 6-7" in diameter:
Step 4: Make the Petals 3D:
The petals need to be cut and glued to give more depth to each petal. To do this you cut about 2-3" from the base of the petal straight up towards to top of the petal, dead center.
Then overlap the slit pieces to make the petal start to curve out, use the hot glue to glue the ends in place.
Repeat this for all the petals except for one of the smallest petals.
Step 5: Make the center petal:
Using the one smallest petal that you did not make 3D, roll it up starting from the left to the right, glue to hold the roll in place.
Step 6: Glue on the Petals:
Starting with the largest petal first, glue each petal to the circle base, overlapping slightly. (I chose to glue it so the curve is inwards, we made some so the curve goes out, it is up to you)
Now glue the next largest petals inside the largest, spacing the petals so they are off center from the largest.
Continue this with each additional size of petals.
In the very center glue the center piece you created
That's it!
These are very easy to pin on the wall, just use one pushpin in the center of the flower.


Thanks a ton, for sharing this helpful post here. I was wondering what activity can be added to my daughter’s birthday party. I have booked an outdoor event space San Francisco for the celebration and I wanted to add good games and activities to the day.
ReplyDeleteصيانة افران الغاز بالطائف
ReplyDeleteJ9hpM6Z9pk